

Velbus
Velbus 集成用于控制 Velbus 模块。它支持 Velbus USB、Velbus 串口和 TCP/IP 网关。
要使用 Velbus 集成,你需要将 Velbus 模块连接到 Velbus USB 或 TCP/IP 接口。
此集成可通过 UI 配置。前往 设置 > 设备与服务 添加。
配置参数
在设置过程中,你会看到两种连接到 Velbus 总线的方式:
- USB
- TCP/IP
系统会执行连接测试以确认连接正常。如果测试成功,集成将被添加到 Home Assistant。
USB
USB 连接是一种接入 Velbus 总线的方式。你需要使用 Velbus USB 接口来连接总线。该 USB 接口连接到 Home Assistant 设备的 USB 端口。 系统会自动检测 USB 接口设备,并在列表中显示。 从列表中选择正确的 USB 接口,然后选择 Submit。
系统会执行连接测试以确认连接是否正常。如果正常,集成将被添加到 Home Assistant。
TCP/IP
TCP/IP 连接也是接入 Velbus 总线的一种方式。你需要在网络中提供一个可用的 Velbus TCP/IP 接口。
示例:signum
- tls: yes
- host: 你的 signum IP 地址
- port: 27015
- password: 你的 signum 密码(如果已配置)
示例:velser
- tls: no
- host: 你的 velser IP 地址
- port: 6000
- password: 留空
示例:Home Assistant 附加组件
- tls: 取决于你的配置
- host: 你的 Home Assistant IP 地址
- port: 如果使用默认值则为 27015
- password: 留空
支持的功能
Velbus 集成支持以下功能:
Switch
每个继电器模块都会在 Home Assistant 中显示为一个开关实体。你可以打开或关闭开关来控制继电器。
Light
每个调光模块都会在 Home Assistant 中显示为一个灯光实体。你可以打开或关闭灯光,并设置亮度级别。 对于每个输入模块,系统还会创建一个灯光实体来控制按键 LED。你可以打开或关闭 LED,并设置闪烁模式。
输入模块上的按键 LED 默认处于禁用状态。你可以在网页界面的 Configuration 页面中的 Devices 面板里启用它们。
Binary sensor
每个输入模块都会在 Home Assistant 中显示为一个二进制传感器实体。输入激活时,二进制传感器为开;输入未激活时,为关。
Select
每个支持程序的模块都会在 Home Assistant 中显示为一个选择实体。你可以选择要激活的程序。
Climate
每个支持恒温器功能的模块都会在 Home Assistant 中显示为一个气候实体。你可以设置目标温度、模式(heat/cool)以及预设模式(away/comfort/eco/home)。
Cover
每个百叶窗模块都会在 Home Assistant 中显示为一个 cover 实体。你可以打开和关闭百叶窗,如果模块支持,还可以设置百叶窗位置。
Button
每个输入模块都会在 Home Assistant 中提供一个按钮实体,用于触发按键按下事件。这可用于从 Home Assistant 触发 Velbus 动作。
Sensor
某些模块会公开可在 Home Assistant 中使用的传感器。 目前已知并已实现的传感器包括:
- 能耗传感器:kWh
- 温度传感器:°C
- 光照等级传感器:Lux
- PSU 电压传感器:Voltage
- PSU 电流传感器:Amps
- PSU 负载传感器:Percentage
模拟输入模块(VMB4AN)会提供 4 个传感器实体,用于读取模拟值。 VMBMETEO 模块会提供多个传感器实体,用于读取温度、湿度、风速、风向和降雨量。
VLP 文件导入
:::note 此步骤为可选。
::: 在配置的下一步中,你可以选择导入 Velbus VLP 配置文件。这是可从 VelbusLink 软件中导出的配置文件。 这样可以省去总线扫描步骤,并根据配置文件创建所有设备和实体。
如果你没有 VLP 文件,或者不想导入它,可以跳过此步骤。集成会通过扫描总线来发现已连接的模块,但这种方式已知不如使用 VLP 文件可靠。
重新配置集成
你可以按照以下步骤重新配置 Velbus 集成:
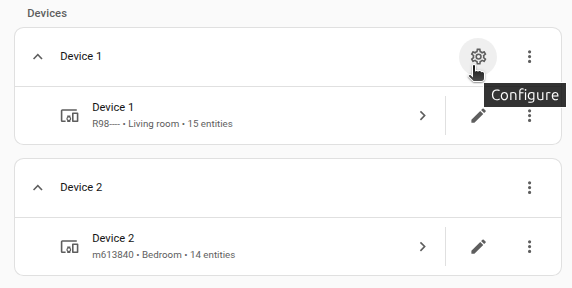
Options
To define options for Velbus, follow these steps:
-
In Home Assistant, go to Settings > Devices & services.
-
If multiple instances of Velbus are configured, choose the instance you want to configure.
-
On the card, select the cogwheel
. - If the card does not have a cogwheel, the integration does not support options for this device.
-
Edit the options, then select Submit to save the changes.
操作
velbus.sync clock:将 Velbus 时间同步到本地时钟。velbus.scan:扫描总线上的新设备。velbus.set_memo_text:在 Velbus 显示模块上显示备忘文本。velbus.clear_cache:清除整个 velbuscache,或仅清除某一个模块的缓存。
操作:Sync clock
velbus.sync_clock 操作会将 Velbus 模块的时钟同步到运行 Home Assistant 的设备时钟。这与 VelbusLink 软件中的 “sync clock” 按钮作用相同。
操作:Scan
velbus.scan 操作会同步总线与 Home Assistant 之间的模块信息。这与 VelbusLink 软件中的 “scan” 按钮作用相同。
操作:Set memo text
velbus.set_memo_text 操作用于向 VMBGPO(D) 和 VMBELO 等 Velbus 模块发送要显示的备忘文本。
示例:
操作:Clear cache
velbus.clear_cache 操作可以清除单个模块的缓存或整个缓存。清除完成后,集成会开始新的扫描。当你通过 velbuslink 修改配置后,可使用此操作。
示例
将 Velbus 按钮联动到其他实体
Velbus 集成允许你将 Velbus 按钮(例如 VMBGPOD 模块上的按钮)链接到 Home Assistant 中可控制的实体。 实际联动可通过两条自动化规则实现。一条规则用于通过按钮控制设备,另一条规则用于在实体状态变化时立即更新按钮 LED 状态。
VMB7IN 与能源仪表板
VMB7IN 传感器可以接入 Home Assistant 的能源仪表板,以跟踪你的能源消耗。
在某些情况下,VMB7IN 传感器不会报告计数器实际统计的内容。如果计数器与能源设备相关,通常可以直接正常使用。
但如果 VMB7IN 传感器是水表或燃气表,你需要在 configuration.yaml 文件中明确指定这一点。
device_class 属性可以有两个值:
- gas:如果计数器表示燃气表
- water:如果计数器表示水表
数据更新
此集成为事件驱动,这意味着一旦发生变化,Velbus 模块就会立即将更新推送到 Home Assistant。这样可以确保 Home Assistant 中实体的状态始终保持最新。
对于传感器实体,Velbus 模块会定期发送更新。这些更新的时间间隔可通过 VelbusLink 软件配置。
已知限制
- 此集成不会重新编程 Velbus 模块。凡是未在 Velbus 模块协议 中实现的更改,都需要通过 VelbusLink 软件完成。
- 此集成不支持升级 Velbus 模块固件。这需要通过 VelbusLink 软件完成。
- 对于继电器模块,此集成不支持强制开/关状态。这也需要通过 VelbusLink 软件完成。
故障排除
如果你在使用 Velbus 集成时遇到问题,可以启用调试日志以获取更多问题信息。
常见问题
- 如果你使用 VelbusLink 软件更改了 Velbus 模块配置,可能需要通过
velbus.clear_cache操作清除 Velbus 缓存,以确保 Home Assistant 获取最新配置。 - 如果你为集成使用了 VLP 文件配置,请确保 VLP 文件是最新的,并与 Velbus 模块配置一致。
启用调试日志
要为 Velbus 集成启用调试日志,你可以查阅 Home Assistant 故障排除文档 了解更多信息。
无法连接到 Velbus 接口
症状:“Unable to setup Velbus”
此错误表示 Home Assistant 无法连接到 Velbus 接口。
解决方法
请尝试以下步骤:
- 对于 USB 连接:
- 确保 Velbus USB 接口已正确连接到 Home Assistant 设备。
- 确保没有其他应用程序(例如 VelbusLink)同时占用 Velbus USB 接口。
- 对于 TCP/IP 连接:
- 确保 Velbus TCP/IP 接口已通电并连接到网络。
- 确认 IP 地址和端口号正确。
- 确认防火墙或网络安全设置未阻止到 Velbus TCP/IP 接口的连接。
模块未被检测到
症状:"Certain modules are not detected by the integration"
此问题表示部分 Velbus 模块未被 Velbus 集成检测到。
说明
这通常由以下原因之一导致:
- Velbus 模块未正确连接到 Velbus 总线。
- Velbus 模块未通电。
- 添加新模块后尚未执行 Velbus 总线扫描。
- VelbusLink 软件本身也未检测到这些 Velbus 模块。
- Velbus 集成调试日志中存在与模块检测相关的错误消息。
解决方法
- 检查 VelbusLink 软件是否能正确检测到所有模块。
- 如果 VelbusLink 软件能检测到所有模块,但它们未显示在 Home Assistant 中,请提交错误报告,并附上调试日志、诊断数据和你的 VLP 文件。
支持的设备
Velbus 集成支持多种 Velbus 模块。以下是部分受支持模块的非完整列表:
- VMB1RYNOS
- VMBPIRM
- VMBPIRC
- VMBPIRO
- VMBGP4PIR
- VMB1BLS
- VMBDMI-R
- VMBMETEO
- VMB4AN
- VMBEL1
- VMBEL2
- VMBEL4
- VMBELO
- VMBELPIR
- VMBGP1-2
- VMBGP2-2
- VMBGP4-2
- VMBGPOD-2
- VMBGP4PIR-2
- VMB1RYS
- VMBIN
- VMB4PB
- VMBDALI
- VMB4RYLD-10
- VMB4RYNO-10
- VMB2BLE-10
- VMB8DC-20
- VMB6PB-20
- VMBPIR-20
- VMB8IN-20
- VMBEL1-20
- VMBEL2-20
- VMBEL4-20
- VMBELO-20
- VMBGP1-20
- VMBGP2-20
- VMBGP4-20
- VMBGPO-20
- VMBPIRO-20
- VMBDALI-20
- VMBEL4PIR-20
- VMBGP4PIR-20
- VMB2BLE-20
不支持的设备
以下 Velbus 模块当前不受此集成支持:
- VMBRF8S
- VMBVP01
- VMBCM3
- VMBUSBIP
- VMBKP
- VMBSIG
- VMBSIG-20
- VMBSIG-21
使用场景
- 使用 Home Assistant 内置的 recorder 和历史记录功能,长期保存 Velbus 传感器数据统计信息。
- 根据时间、状态变化或其他传感器数据创建自动化,以控制 Velbus 设备。
- 将 Velbus 设备与 Home Assistant 支持的其他智能家居设备和服务集成。
- 通过 Home Assistant 使用 Google Assistant 或 Amazon Alexa 等语音助手控制 Velbus 设备。
- 在 Home Assistant 中创建自定义仪表板,以监控和控制 Velbus 设备。
- 使用 Home Assistant 的能源管理功能,结合 Velbus 能源传感器监控并优化能耗。
- 将 Velbus 按钮联动到其他 Home Assistant 实体,实现无缝控制。
- 使用集成到 Home Assistant 的 Velbus 恒温器模块实现气候控制自动化。
- 使用 Velbus 气象模块监控环境状况,并根据传感器读数创建自动化。
- 为特定事件设置通知,例如 Velbus 传感器检测到运动或门被打开时。
删除集成
你可以按照以下步骤删除 Velbus 集成及其实体:
To remove an integration instance from Home Assistant
- Go to Settings > Devices & services and select the integration card.
- From the list of devices, select the integration instance you want to remove.
- Next to the entry, select the three-dot
menu. Then, select Delete.
注意:删除集成会从 Home Assistant 中移除所有 Velbus 设备及其历史记录。