Telegram 机器人
在移动或桌面设备上使用 Telegram 向 Home Assistant 发送消息或命令,或从 Home Assistant 接收消息或命令。
此集成创建通知操作,可用于发送、编辑、接收消息,或从 Telegram 机器人账户 下载附件。
简介 - Telegram 机器人平台
平台是 Telegram 机器人实现,用于管理与 Telegram 的通信以发送和接收消息。
设置此集成时,您应该指定适合您的环境和用例的平台。
广播
Telegram 实现支持仅发送消息。您的 Home Assistant 实例不必暴露在互联网上,也不需要轮询来接收发送到机器人的消息或命令。
轮询
Telegram 聊天机器人轮询实施。
此实现通过长轮询从 Telegram 获取数据,超时时间为 10 秒。
(在长轮询中,如果没有来自 Telegram 的更新,机器人将等待超时,然后再次获取数据。)
您的 Home Assistant 实例不必暴露在互联网上。
网络钩子
Telegram 聊天机器人 Webhook 实现如 Telegram 文档 中所述。
此实现允许 Telegram 将更新直接推送到您的服务器,并要求您的 Home Assistant 实例暴露在互联网上。
先决条件
在 Telegram 中创建一个机器人
要创建您的第一个 Telegram 机器人,请按照下列步骤操作:
- 告诉 Telegram 为您创建一个机器人:
- 在 Telegram 中,打开与 @BotFather 的聊天并输入
/newbot。
- 按照屏幕上的说明操作并为您的机器人命名。
- BotFather 将为您提供新机器人的链接和 HTTP API 令牌。
- 将 API 令牌 存储在安全的地方,它将用于稍后设置集成。
- 获取您的聊天ID:
- 发送任何消息至 @id_bot。
- 记下机器人响应中 ID 字段的值。设置集成后,您需要将此 ID 添加到白名单中,以允许您的新机器人通过此目标发送/接收消息。
- 与您的新机器人进行首次联系(不允许机器人主动与用户联系):
- 在与 BotFather 的对话中,选择链接以打开聊天。
- 在聊天中,输入
/start。
允许 Telegram 机器人访问您的 Home Assistant 文件(可选)
要使 Telegram 机器人能够发送本地文件,您必须通过将文件的文件夹添加到 allowlist_external_dirs 来授予对其的访问权限。
示例 configuration.yaml:
homeassistant:
  allowlist_external_dirs:
    - "/media"
允许 Telegram 连接到您的 Home Assistant(仅限 Webhooks 平台)
Note
此集成当前不支持 HTTPS 自签名证书。
如果您使用反向代理或直接方法,请确保您的证书由公共证书颁发机构 (CA) 签名。
:::
如果您计划使用 Webhooks 平台,则需要允许 Telegram 使用以下方法之一连接到您的 Home Assistant:
Home Assistant Cloud
如果您订阅了 Home Assistant Cloud,则可以 启用远程访问 您的 Home Assistant。
反向代理
如果您的 Home Assistant 位于启用了 HTTPS 的可公开访问的反向代理(例如 NGINX、Caddy、Traefik)后面,请执行以下操作:
- 转到 Settings > System > Network 并配置 Home Assistant URL。
- 配置 HTTP 集成 以允许 Home Assistant 接受来自反向代理的连接:
- 将
use_x_forwarded_for 设置为 true。
- 将反向代理的 IP 地址添加到
trusted_proxies。
示例 configuration.yaml:
http:
  use_x_forwarded_for: true
  trusted_proxies:
    - 192.168.0.0/16
直接方式
如果您的 Home Assistant 可公开访问,请执行以下操作:
- 转到 Settings > System > Network 并配置 Home Assistant URL。
- 通过配置以下变量来配置 HTTP 集成 以在 Home Assistant 上启用 HTTPS:
server_hostserver_portssl_certificatessl_key
:::note 配置
此集成可通过 UI 配置。前往 设置 > 设备与服务 添加。
平台:
描述:Telegram 机器人类型,`Broadcast`、`Polling` 或 `Webhooks`。
API 密钥:
描述:您的机器人的 API 令牌。
API 端点:
描述:Telegram 机器人 API 服务器的端点。仅当您使用自托管或第三方 [Telegram 机器人 API 服务器](https://core.telegram.org/bots/api#using-a-local-bot-api-server) 时,才应更改此值。更改此值将导致官方 Telegram 机器人 API 服务器出现“10 分钟锁定”。默认为位于 `https://api.telegram.org` 的官方 Telegram 机器人 API 服务器。
代理网址:
描述:代理 URL(如果位于代理后方),可选地包含用户名和密码。(`socks5://username:password@proxy_ip:proxy_port`)。
Webhooks 配置
Note
如果您使用 Home Assistant Cloud,则必须在 受信任的网络 字段中包含 127.0.0.1,因为传入请求的 IP 地址不会转发到您的 Home Assistant。
:::
:::note
如果您使用自定义 API 端点,则必须在 受信任的网络 字段中以 CIDR 表示法包含服务器的 IP 地址或 IP 范围,例如 192.168.0.0/16。
:::
如果您选择了 Webhooks Telegram 机器人类型,集成设置将继续执行 Webhooks 配置步骤。
URL:
描述:允许覆盖来自 Home Assistant [配置](/home-assistant/integrations/homeassistant/#editing-the-general-settings-in-yaml) 的外部 URL 以进行不同的设置 (`https://<public_url>:<port>`)。
受信任的网络:
描述:Telegram 服务器访问 ACL 作为列表。默认为 `149.154.160.0/20, 91.108.4.0/22`。
选项
To define options for Telegram 机器人, follow these steps:
-
In Home Assistant, go to Settings > Devices & services.
-
If multiple instances of Telegram 机器人 are configured, choose the instance you want to configure.
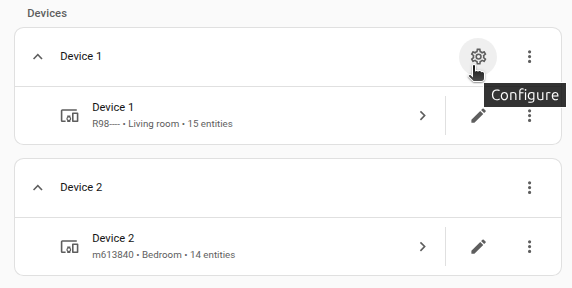
-
On the card, select the cogwheel .
- If the card does not have a cogwheel, the integration does not support options for this device.
-
Edit the options, then select Submit to save the changes.
解析模式:
描述:如果消息数据中未明确,则消息的默认解析器为 `markdown`(旧版)、`markdownv2`、`html` 或 `plain_text`。请参阅 Telegram 的 [格式化选项](https://core.telegram.org/bots/api#formatting-options) 了解更多信息。
通过子条目将聊天 ID 加入允许列表
Telegram 聊天 ID 是单个用户(正面)或聊天组(负面)的唯一数字标识符。
您必须将 Telegram 机器人的聊天 ID 列入许可名单,然后才能发送/接收该聊天的消息。
要将聊天 ID 获取聊天 ID 加入允许列表并创建子条目:
- 转至 设置 > 设备与服务。
- 选择 Telegram 机器人集成。
- 在条目旁边,选择三个点 菜单。然后,选择 添加允许的聊天 ID。
聊天ID:
描述:代表可以向其发送消息的用户或群聊的 ID。
通知者
此集成将为每个配置的聊天 ID 添加一个通知实体。
您可以使用 notify.send_message 操作来发布通知。
YAML 配置示例
action: notify.send_message
data:
  message: "Reminder: Have you considered frogs?"
  entity_id: notify.telegram_bot_chat
通知操作
可用动作:send_message、send_photo、send_video、send_animation、send_voice、send_sticker、send_document、send_location、send_chat_action、edit_message、edit_message_media、edit_caption、edit_replymarkup、answer_callback_query、delete_message、leave_chat 和 set_message_reaction。
可以通过以下任一方式指定聊天目标:
entity_idconfig_entry_id 和 chat_id- 如果您只有 1 个机器人且未指定聊天目标(
entity_id 或 chat_id),则机器人的第一个子条目将用作默认聊天。
发送内容 (send_*) 的操作将返回已传递消息的 message_id/chat_id 列表(在名为 chats 的属性中)。这将填充响应数据,您可以在自动化中进一步利用它,以便稍后根据 message_id 编辑/删除消息。有关使用说明,请参阅本页后面的示例。
动作 telegram_bot.send_message
发送通知。
此操作返回 发送消息响应。
动作 telegram_bot.send_photo
发送照片。
此操作返回 发送消息响应。
动作 telegram_bot.send_video
发送视频。
此操作返回 发送消息响应。
动作 telegram_bot.send_animation
发送动画。
此操作返回 发送消息响应。
动作 telegram_bot.send_voice
发送语音消息。
此操作返回 发送消息响应。
动作 telegram_bot.send_sticker
发送贴纸。
此操作返回 发送消息响应。
动作 telegram_bot.send_document
发送文件。
此操作返回 发送消息响应。
动作 telegram_bot.send_location
发送位置。
此操作返回 发送消息响应。
动作 telegram_bot.send_poll
发送投票。
此操作返回 发送消息响应。
动作 telegram_bot.send_chat_action
发送聊天操作。当机器人响应可能延迟时,使用它通过相关的“打字”操作通知用户,以便他们知道消息即将到来。 Telegram 在 5 秒后或回复到达时清除此状态。
动作 telegram_bot.edit_message
编辑对话中之前发送的消息。
编辑对话中之前发送的消息媒体。
动作 telegram_bot.edit_caption
编辑之前发送的消息的标题。
动作 telegram_bot.edit_replymarkup
编辑先前发送的消息的内联键盘。
动作 telegram_bot.answer_callback_query
响应通过单击在线键盘按钮发起的回调查询。答案将作为聊天屏幕顶部的通知或警报显示给用户。
动作 telegram_bot.delete_message
删除对话中之前发送的消息。
动作 telegram_bot.leave_chat
从添加该机器人的聊天组中删除该机器人。
动作 telegram_bot.set_message_reaction
设置机器人对给定消息的反应。
动作 telegram_bot.download_file
下载之前发送到机器人的文件并将其保存到 Home Assistant 主机上的本地路径。
YAML 用法示例:
action: telegram_bot.download_file
data:
  config_entry_id: "<your_config_entry_id>"
  file_id: "ABCD1234Efgh5678Ijkl90mnopQRStuvwx"
  directory_path: "/config/telegram_bot/"
  file_name: "my_downloaded_file"
:::note
- 有关文件大小限制和下载行为,请参阅 python-telegram-bot 文档:python-telegram-bot - get_file
- 目前,机器人可以下载最大 20 MB 的文件。
- 如果您需要从前端提供或访问文件,请确保目标
directory_path 包含在 allowlist_external_dirs 中。
操作的响应模式
Tip
可以使用操作的 response_variable 来访问响应。
您可以参考 先发送消息,再延迟编辑 自动化以获取响应的使用示例。
发送消息回复
响应架构:
聊天对象架构:
响应示例:
chats:
  - chat_id: 1234567890
    message_id: 100
  - chat_id: -1234567890
    message_id: 200
Telegram 通知平台
:::warning
该通知平台已被标记为旧版,将来可能会被弃用。
请改用 通知器。
:::
telegram 通知平台 需要 telegram_bot 集成才能使用,它旨在生成自定义快捷方式(notify.USERNAME),以使用旧语法将通知(消息、照片、文档和位置)发送到特定的 chat_id,从而实现向后兼容。还支持数据属性 parse_mode、disable_notification、message_tag、disable_web_page_preview 和 message_thread_id。
所需的 YAML 配置现在减少为:
notify:
  - platform: telegram
    name: NOTIFIER_NAME
    chat_id: USER_CHAT_ID
事件实体
Telegram 机器人 集成提供了一个事件实体,表示最后发送或接收消息的状态。它还提供了多个可在自动化中使用的事件属性。
事件:收到附件
当机器人收到文件时,会触发 telegram_attachment 事件。
事件属性示例:
bot:
  config_entry_id: "<config entry id of the bot>"
  first_name: "<first name of the bot>"
  id: "<id of the bot>"
  last_name: "<last name of the bot>"
  username: "<username of the bot>"
chat_id: "<origin chat id>"
date: "<message timestamp>"
event_type: "telegram_attachment"
file_id: "<unique identifier for the file>"
file_mime_type: "<MIME type of the file, if available>"
file_name: "<name of the file, if available>"
file_size: "<file size in bytes, if available>"
friendly_name: "<name of the event entity>"
from_first: "<first name of the sender>"
from_last: "<last name of the sender>"
id: "<message id>"
message_thread_id: "<message thread id>"
text: "<caption of the file, if available>"
user_id: "<id of the sender>"
自动化示例:
triggers:
  - trigger: state
    entity_id:
      - event.bot_update_event # Replace with your telegram bot event entity
conditions:
  - condition: state
    entity_id: event.bot_update_event # Replace with your telegram bot event entity
    attribute: event_type
    state: telegram_attachment
actions:
  - action: notify.persistent_notification
    data:
      message: >-
        Received a file.
        MIME type   : {{ trigger.to_state.attributes.file_mime_type }}
        Size (bytes): {{ trigger.to_state.attributes.file_size }}
        File ID     : {{ trigger.to_state.attributes.file_id }}
        File name   : {{ trigger.to_state.attributes.file_name }}
事件:收到回调查询
当机器人从内联键盘按钮接收到回调查询时,会触发 telegram_callback 事件。
:::tip
id 属性用作 answer_callback_query 操作的 callback_query_id 参数。
:::
事件属性示例:
# Callback query always have no args
args: []
bot:
  config_entry_id: "<config entry id of the bot>"
  first_name: "<first name of the bot>"
  id: "<id of the bot>"
  last_name: "<last name of the bot>"
  username: "<username of the bot>"
chat_id: "<origin chat id>"
chat_instance: "<chat instance id>"
command: "<callback query>"
data: "<data associated to action callback>"
event_type: "telegram_callback"
from_first: "<first name of the sender>"
from_last: "<last name of the sender>"
friendly_name: "<name of the event entity>"
id: "<callback id>"
message: "<message origin of the action callback>"
user_id: "<id of the sender>"
自动化示例:
triggers:
  - trigger: state
    entity_id:
      - event.bot_update_event # Replace with your telegram bot event entity
conditions:
  - condition: state
    entity_id: event.bot_update_event # Replace with your telegram bot event entity
    attribute: event_type
    state: telegram_callback
actions:
  - action: notify.persistent_notification
    data:
      message: >-
        Received callback query.
        Callback ID   : {{ trigger.to_state.attributes.id }}
        Callback query: {{ trigger.to_state.attributes.data }}
事件:收到命令
当机器人收到命令时,会触发 telegram_command 事件。
命令类似于 /thecommand 或 /othercommand with some args。
事件属性示例:
args: "<any other text following the command>"
bot:
  config_entry_id: "<config entry id of the bot>"
  first_name: "<first name of the bot>"
  id: "<id of the bot>"
  last_name: "<last name of the bot>"
  username: "<username of the bot>"
chat_id: "<origin chat id>"
command: "/thecommand"
date: "<message timestamp>"
event_type: "telegram_command"
friendly_name: "<name of the event entity>"
from_first: "<first name of the sender>"
from_last: "<last name of the sender>"
id: "<message id>"
message_thread_id: "<message thread id>"
user_id: "<id of the sender>"
自动化示例:
triggers:
  - trigger: state
    entity_id:
      - event.bot_update_event # Replace with your telegram bot event entity
conditions:
  - condition: state
    entity_id: event.bot_update_event # Replace with your telegram bot event entity
    attribute: event_type
    state: telegram_command
actions:
  - action: notify.persistent_notification
    data:
      message: >-
        Received command.
        Command: {{ trigger.to_state.attributes.command }}
        Args   : {{ trigger.to_state.attributes.args }}
事件:收到文本消息
当机器人收到文本消息(任何不以 / 开头的消息)时,会触发 telegram_text 事件。
事件属性示例:
bot:
  config_entry_id: "<config entry id of the bot>"
  first_name: "<first name of the bot>"
  id: "<id of the bot>"
  last_name: "<last name of the bot>"
  username: "<username of the bot>"
chat_id: "<origin chat id>"
date: "<message timestamp>"
event_type: "telegram_text"
friendly_name: "<name of the event entity>"
from_first: "<first name of the sender>"
from_last: "<last name of the sender>"
id: "<message id>"
message_thread_id: "<message thread id>"
text: "<the text received>"
user_id: "<id of the sender>"
自动化示例:
triggers:
  - trigger: state
    entity_id:
      - event.bot_update_event # Replace with your telegram bot event entity
conditions:
  - condition: state
    entity_id: event.bot_update_event # Replace with your telegram bot event entity
    attribute: event_type
    state: telegram_text
actions:
  - action: notify.persistent_notification
    data:
      message: >-
      Message received.
      Chat ID   : {{ trigger.to_state.attributes.chat_id }}
      First name: {{ trigger.to_state.attributes.from_first }}
      Last name : {{ trigger.to_state.attributes.from_last }}
      Message   : {{ trigger.to_state.attributes.text }}
事件:消息已发送
当机器人发送任何类型的消息时,都会触发 telegram_sent 事件。
:::tip
message_id 属性可与编辑、删除和 set_message_reaction 操作一起使用,以与先前发送的消息进行交互。
:::
事件属性示例:
bot:
  config_entry_id: "<config entry id of the bot>"
  first_name: "<first name of the bot>"
  id: "<id of the bot>"
  last_name: "<last name of the bot>"
  username: "<username of the bot>"
chat_id: "<origin chat id>"
from_first: "<first name of the sender>"
from_last: "<last name of the sender>"
id: "<message id>"
message_thread_id: "<message thread id>"
user_id: "<id of the sender>"
自动化示例:
triggers:
  - trigger: state
    entity_id:
      - event.bot_update_event # Replace with your telegram bot event entity
conditions:
  - condition: state
    entity_id: event.bot_update_event # Replace with your telegram bot event entity
    attribute: event_type
    state: telegram_sent
actions:
  - action: notify.persistent_notification
    data:
      message: >-
      Bot sent a message.
      Chat ID   : {{ trigger.to_state.attributes.chat_id }}
      Message ID: {{ trigger.to_state.attributes.message_id }}
使用内联键盘和回调查询的自动化示例
一个简单的示例,展示了内联键盘的一些回调功能,其中包含一个简单的普通文本重复器,它提供了一个带有 3 个按钮的内联键盘:“编辑”、“否”和“删除按钮”:
- 按“编辑”可更改已发送的消息。
- 按“否”仅显示简短通知(回答回拨查询)。
- 按“删除按钮”可更改内联键盘,删除该按钮。
文本复读器:
alias: Telegram bot that repeats text
triggers:
  - trigger: state
    entity_id:
      - event.bot_update_event # Replace with your telegram bot event entity
conditions:
  - condition: state
    entity_id: event.bot_update_event # Replace with your telegram bot event entity
    attribute: event_type
    state: telegram_text
actions:
  - action: telegram_bot.send_message
    data:
      message: "You said: {{ trigger.to_state.attributes.text }}"
      title: "*Dumb automation*"
      disable_notification: true
      inline_keyboard:
        - Edit message:/edit_msg, Don't:/do_nothing
        - Remove this button:/remove_button
消息编辑器:
alias: Telegram bot that edits the last sent message
description: ""
triggers:
  - trigger: state
    entity_id:
      - event.bot_update_event # Replace with your telegram bot event entity
conditions:
  - condition: state
    entity_id: event.bot_update_event # Replace with your telegram bot event entity
    attribute: event_type
    state: telegram_callback
  - condition: state
    entity_id: event.bot_update_event # Replace with your telegram bot event entity
    attribute: command
    state: /edit_msg
actions:
  - action: telegram_bot.answer_callback_query
    data:
      show_alert: true
      message: Editing the message!
      callback_query_id: "{{ trigger.to_state.attributes.id }}"
  - action: telegram_bot.edit_message
    data:
      inline_keyboard:
        - Edit message:/edit_msg, Don't:/do_nothing
        - Remove this button:/remove_button
      message_id: "{{ trigger.to_state.attributes.message.message_id }}"
      chat_id: "{{ trigger.to_state.attributes.chat_id }}"
      title: "*Message edit*"
      message: >-
        Callback received from {{ trigger.to_state.attributes.from_first }}.
        Message id: {{ trigger.to_state.attributes.message.message_id }}.
        Data: {{ trigger.to_state.attributes.data|replace("_", "\_") }}
键盘编辑器:
alias: Telegram bot that edits the keyboard
triggers:
  - trigger: state
    entity_id:
      - event.bot_update_event # Replace with your telegram bot event entity
conditions:
  - condition: state
    entity_id: event.bot_update_event # Replace with your telegram bot event entity
    attribute: event_type
    state: telegram_callback
  - condition: state
    entity_id: event.bot_update_event # Replace with your telegram bot event entity
    attribute: command
    state: /remove_button
actions:
  - action: telegram_bot.answer_callback_query
    data:
      callback_query_id: "{{ trigger.to_state.attributes.id }}"
      message: Callback received for editing the inline keyboard!
      show_alert: false
  - action: telegram_bot.edit_replymarkup
    data:
      inline_keyboard:
        - Edit message:/edit_msg, Don't:/do_nothing
      chat_id: "{{ trigger.to_state.attributes.chat_id }}"
      message_id: last
只承认“否”的答案:
alias: Telegram bot that simply acknowledges
triggers:
  - trigger: state
    entity_id:
      - event.bot_update_event # Replace with your telegram bot event entity
conditions:
  - condition: state
    entity_id: event.bot_update_event # Replace with your telegram bot event entity
    attribute: event_type
    state: telegram_callback
  - condition: state
    entity_id: event.bot_update_event # Replace with your telegram bot event entity
    attribute: command
    state: /do_nothing
actions:
  - action: telegram_bot.answer_callback_query
    data:
      message: OK, you said no!
      callback_query_id: "{{ trigger.to_state.attributes.id }}"
用于接收已发送消息的 chat_id 和 message_id 标识符的示例自动化
以下示例自动化使用输入实体存储最后发送的消息的 chat_id 和 message_id。
这些属性随后可用于其他 Telegram 机器人 操作。
alias: Notifications about messages sent by Telegram bot
triggers:
  - trigger: state
    entity_id:
      - event.bot_update_event # Replace with your telegram bot event entity
conditions:
  - condition: state
    entity_id: event.bot_update_event # Replace with your telegram bot event entity
    attribute: event_type
    state: telegram_sent
actions:
  - action: input_number.set_value
    data_template:
      value: "{{ trigger.to_state.attributes.chat_id }}"
    target:
      entity_id: input_number.chat_id # Replace with your input entity
  - action: input_number.set_value
    data_template:
      value: "{{ trigger.to_state.attributes.message_id }}"
    target:
      entity_id: input_number.message_id # Replace with your input entity
示例:带有格式化文本的 send_message
actions:
  - action: telegram_bot.send_message
    data:
      title: Example Message
      message: 'Message with *BOLD*, _ITALIC_ and `MONOSPACE` Text'
示例:带消息标签的 send_message
actions:
  - action: telegram_bot.send_message
    data:
      title: Example Message
      message: "Message with tag"
      message_tag: "example_tag"
示例:禁用网页预览的 send_message
actions:
  - action: telegram_bot.send_message
    data:
      message: >-
        <a href="https://www.home-assistant.io/">HA site</a>
      parse_mode: html
      disable_web_page_preview: true
示例:先 send_message,再在延迟后编辑
actions:
  - action: telegram_bot.send_message
    data:
      message: testing
    response_variable: response
  - delay:
      seconds: 5
  - action: telegram_bot.edit_message
    data:
      message: done testing
      chat_id: "{{ response.chats[0].chat_id }}"
      message_id: "{{ response.chats[0].message_id }}"
示例:向群组主题发送 send_message
actions:
  - action: telegram_bot.send_message
    data:
      message: "Message to a topic"
      message_thread_id: 123
示例:自动发送消息并在延迟后删除
alias: telegram send message and delete
actions:
  - action: telegram_bot.send_message
    data:
      message: testing
    response_variable: response
  - delay:
      seconds: 5
  - repeat:
      sequence:
        - action: telegram_bot.delete_message
          data:
            message_id: "{{ repeat.item.message_id }}"
            chat_id: "{{ repeat.item.chat_id }}"
      for_each: "{{ response.chats }}"
已知限制
此集成中不提供以下功能:
- 编辑机器人(您可以使用 Telegram 应用程序上的 @BotFather 来编辑机器人)
- 所有与支付相关的功能,例如 Telegram Premium、Telegram Star 和 Telegram Gifts
- Telegram 商业版
- Telegram 广告
- Telegram 迷你应用和迷你应用商店
- 通话和直播
- 壁纸和主题
故障排除
发送消息错误:无法解析实体
当使用诸如 telegram_bot.send_message 之类的发送操作和 markdownv2 解析模式时,如果 message 字段中的用户输入包含格式错误的 Markdown 语法,则操作将失败并出现“无法解析实体”错误。
您可以执行以下任一步骤来解决此问题:
- 通过配置 Telegram 机器人选项或通过操作的
parse_mode 数据属性指定来使用 plain_text 解析模式。
- 使用前面的“\”字符转义
message 字段中的特殊字符。
- 根据 格式化选项 格式化您的消息。
Telegram Webhook 机器人无法接收更新
如果您的 Telegram 机器人无法接收更新(例如,未触发除 telegram_sent 之外的所有事件),请按照以下故障排除步骤操作:
- 重新配置您的 Telegram 机器人以使用 轮询 平台并再次测试以验证该问题与 Telegram 和您的 Home Assistant 之间的网络连接无关。
- 检查防火墙规则以验证传入连接未被阻止。
- 验证您的 Webhook URL 是否公开且可访问。
如果问题仍然存在,请参阅 Webhooks 指南 了解更详细的故障排除信息。
删除集成
此集成遵循标准集成删除。不需要额外的步骤。
从 Home Assistant 中删除集成实例
- Go to Settings > Devices & services and select the integration card.
- From the list of devices, select the integration instance you want to remove.
- Next to the entry, select the three-dot menu. Then, select Delete.

