

ASUSWRT
ASUSWRT 集成可以将 Home Assistant 连接到运行 ASUSWRT 固件的 ASUS 路由器。
目前 Home Assistant 支持以下设备类型:
- 存在检测 - ASUSWRT 平台通过查看连接到基于 ASUSWRT 的路由器的设备来提供存在检测。
- 传感器 - ASUSWRT 传感器平台允许您在 Home Assistant 中从 ASUS 路由器获取信息。
此集成可通过 UI 配置。前往 设置 > 设备与服务 添加。
:::important
如果您选择使用 protocol: telnet,则需要在路由器上启用 telnet。
:::
传感器配置
这些传感器会自动创建并关联到路由器设备:
- 已连接设备传感器
- 下载传感器(测量单位:Gigabyte - 每日累计)
- 下载速度传感器(测量单位:Mbit/s)
- 上传传感器(测量单位:Gigabyte - 每日累计)
- 上传速度传感器(测量单位:Mbit/s)
- 负载平均值传感器(1分钟、5分钟、15分钟)
- 温度传感器(2 GHz、5 GHz、6 GHz、CPU)。只会创建您路由器上可用的温度传感器。
如果集成配置为使用 http(s) 协议,还可以使用以下传感器:
- CPU 使用率传感器(总使用率和单核使用率百分比)
- 内存使用率传感器(百分比)
- 空闲内存传感器(Megabyte)
- 已用内存传感器(Megabyte)
- 最后启动传感器(Timestamp)
- 运行时间传感器(HH:MM:SS)
默认情况下,集成将为 HA 已通过其他集成了解的设备创建已启用的设备跟踪器实体。ASUSWRT 集成将为网络上的其他设备创建已禁用的设备跟踪器实体,用户可以在 Home Assistant GUI 中手动启用它们:转到设置 > 设备与服务 > 实体。筛选集成 = ASUSWRT。筛选状态 = 已禁用。现在您应该能看到已禁用的设备跟踪器实体,您可以根据需要逐个启用它们。
Options
To define options for ASUSWRT, follow these steps:
-
In Home Assistant, go to Settings > Devices & services.
-
If multiple instances of ASUSWRT are configured, choose the instance you want to configure.
-
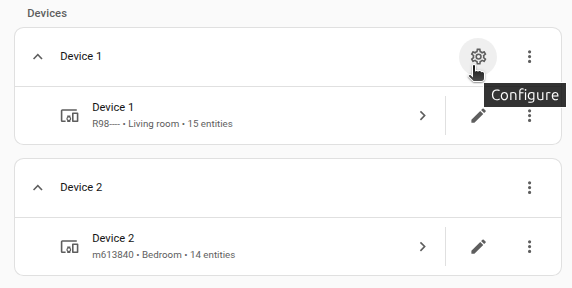
On the card, select the cogwheel
. - If the card does not have a cogwheel, the integration does not support options for this device.
-
Edit the options, then select Submit to save the changes.
如果您不想自动跟踪新检测到的设备,请禁用集成系统选项 启用新添加的实体
Padavan 自定义固件(rt-n56u 项目)
rt-n56u 项目 不像 asuswrt 那样将用于跟踪设备的 dnsmasq.leases 存储在 /var/lib/misc/。但是,通过使用 dnsmasq 变量将 dnsmasq 位置更改为 dnsmasq: '/tmp',此集成仍可用于 rt-n56u 项目
此外,要获取 WAN 端口的统计信息,请指定 interface: 'eth3',因为这是 rt-n56u 项目中使用的接口