文档写作风格指南
Home Assistant 文档使用 Markdown 编写,并遵循 GitHub Flavored Markdown 规范。
总体上,文档应遵循 Microsoft Style Guide。
本页整理了我们额外采用的一些更具体的写作规范。
语言与语气
- 文档原文使用美式英语。
- 当列表中包含三个及以上项目时,请在连词前使用 serial comma(也称 Oxford comma)。例如:"Through the use of additional adapters, Home Assistant allows the use of Zigbee, Z-Wave, and other protocols"。
- 请遵循基本语法和句法规则,例如句子结尾应使用句号。
- 保持客观,不使用带有性别偏向、煽动对立、涉及种族歧视或忽视宗教敏感性的表达。不符合这一要求的贡献可能违反我们的 Code of Conduct。
- 不要使用 "e.g.",请改用 for example、such as 或 like。
- 不要使用 "master/slave"。请改用 "client/server"、"leader/follower"、"main/replica" 或 "controller/device" 等替代说法。
- 品牌名、服务名、协议名、集成名和平台名的大小写必须与官方写法一致。例如应写作 "Z-Wave",而不是 "Zwave"、"Z-wave"、"Z Wave" 或 "ZWave";同样应写作 "Input Select",而不是 "input select" 或 "Input select"。
基础格式
以下是最常见的格式问题:
- 行宽没有硬性限制,请使用自然连贯的段落写法。
- 句号后不要添加两个空格。
标题
页面的第一个标题就是页面标题,它通过顶部 front matter 中的字段定义:
正文中请使用 Markdown 的 2 到 6 级标题:
## Heading level 2
### Heading level 3
#### Heading level 4
##### Heading level 5
###### Heading level 6
请使用 sentence-style capitalization。
不要跳级使用标题。
强调
强调单词时,请使用 _italics_,不要使用 *asterisks*。
不要使用全大写来表示强调。
UI 元素与操作步骤
提到 UI 元素时,请使用 **bold**;表示面包屑路径时,请使用 >。
例如:
1. Under **Settings**, select the three dots menu.
2. Select **Restart Home Assistant** > **Quick reload**.
另请参见:My links。
选择 UI 元素
避免使用动词 "click",因为它只适用于鼠标操作。请改用适用于多种设备的动词,例如 "select"。
如果需要描述明确的鼠标行为,也可以使用 "click",例如 "right-click" 或 "double-click"。
文件路径、文件名、变量与文本输入
提到文件路径、文件名、变量名,或需要用户在输入框中键入的文本时,请使用反引号。
例如:
- The
/boot/config.txt file
- The
this variable
- Enter
/newbot
列表
-
无序列表请使用 -,不要使用 *。
-
有序列表请使用递增编号。
# Good
1. List item 1.
2. List item 2.
3. List item 3.

# Bad
1. List item 1.
1. List item 2.
1. List item 3.
代码块
请使用 Markdown 代码块,并用三个反引号包裹:
```markdown
1. Under **Settings**, select...
```
如果要在代码块中展示另一个代码块(如上例),请在外层代码块中使用四个或更多反引号:
In general, use Markdown code blocks, delimited by three backticks:

````markdown
```markdown
1. Under **Settings**, select...
```
````
在起始反引号后,你可以指定语法高亮所用语言,例如:
所有支持的语言可参考 Rouge lexers 列表。
Jinja2 模板示例
所有包含 Jinja2 模板的示例,都应在代码块 外层 使用 {% raw %} 包裹。
例如:
{% raw %}

```yaml
type: markdown
content: |
  Hello, {{user}}
```

{% endraw %}
表格
- 尽量避免使用表格,优先改用列表。如果必须使用表格,请尽量减少列数,并缩短单元格中的文本:
- 过宽的表格在手持设备上会很难浏览。
- 内容越少,表格越容易阅读。
- 如果表格只有两列,它大概率更适合写成列表。
- 如果确实无法缩短内容,请考虑换用其他表达方式,例如列表或
{% configuration_basic %}。
链接
- 链接到站内页面时,请使用
/ 结尾,而不是文件扩展名(如 .markdown、.md、.mdx)。
例如:[ZBT-2](/developers/connect/zbt-2/),不要写成 [ZBT-2](/developers/connect/zbt-2.markdown)。
- 链接同一仓库内的页面时,请使用从仓库根路径开始的站内链接。
例如:
[ZBT-2](/developers/connect/zbt-2/),不要写成 [ZBT-2](https://www.home-assistant.io/connect/zbt-2/)。
- 不要使用联盟链接或带追踪参数的链接。
- 不要直接裸写 URL,例如
https://example.org 或 <https://example.org>。
图片
如果使用图片,请将其上传到文档仓库中的 images 目录及对应子目录。
不要引用外部图片,例如你私人 GitHub 仓库中的图片。
插入截图时,请使用 Markdown 语法:

也可以使用 HTML:
- 如果希望图片在暗色模式下自动反相,请使用带
invertDark 类名的 HTML。
- 如果要添加图注,请将图注文字写在
<p> 标签内。
例如:
<p class='img'>
<img class='invertDark'
    src='/developers/img/en/documentation/glossary-term_tooltip.png'
    alt='Styling of a glossary term tooltip'
  />
  Styling of a glossary term tooltip
</p>
如果想了解为集成添加图片时的要求,请参见图片、图标与 logo。
视频
引用 YouTube 视频时,请使用以下语法。
如果希望视频从指定时间开始播放,请使用 videoStartAt。
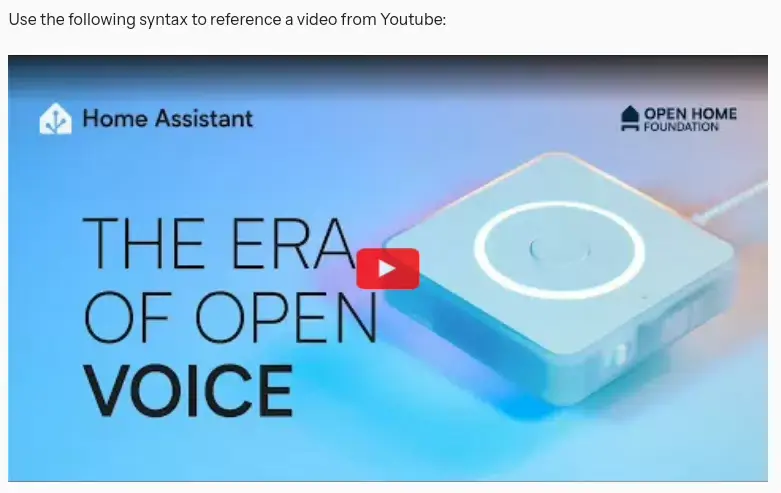 从指定时间开始播放的 YouTube 视频
videoid 应填写 YouTube 链接中 watch?v= 后面的那一段。
<lite-youtube
  videoid="ZgoaoTpIhm8"
  videoStartAt="3907"
  videotitle="Introducing the Home Assistant Voice Preview Edition - Voice: Chapter 8"
></lite-youtube>
可复用文本
对于某些主题,我们已经提供了可直接复用的预定义文本片段。
如果要引入 source/_includes 中的片段,请使用以下 Liquid 语法:
{% include path/to/file.md %}
关于编写集成文档时可复用的示例,请参见 Configuration。
Liquid 语法
我们在 Markdown 中使用 Liquid 进行模板处理。
My links
表示 Home Assistant UI 中的位置时,请使用 My link。
用户选择 My link 后,会直接在自己的 Home Assistant 实例中打开对应页面。
 My link 的样式
例如:
1. Go to {% my integrations title="**Settings** > **Devices & services**" %} and select your integration.
- {% my areas title="**Settings** > **Areas, labels & zones**" %}
- {% my automations title="**Settings** > **Automations & scenes**" %}
- {% my backup title="**Settings** > **System** > **Backups**" %}
- {% my general title="**Settings** > **System** > **General**" %}
- {% my logs title="**Settings** > **System** > **Logs**" %}
- {% my network title="**Settings** > **System** > **Network**" %}
- {% my profile title="**User profile**" %}
如果要获取某个页面对应的 My link,请先在 Home Assistant 中打开该页面,再按下 m 键。
术语表引用
部分 Home Assistant 术语和概念在术语表中有专门解释。
如果你添加了术语定义引用,术语定义会以提示框的形式展示出来。
 术语提示框的样式
语法:
{% term <term> [<text>] %}
使用示例:
{% term integration %}
{% term entity %}
{% term "configuration.yaml" %}
{% term "Home Assistant Operating System" %}
关于术语表的推荐用法,请参见术语表与术语提示。
缩略词与首字母缩写
如果可以,请尽量避免使用缩略词和首字母缩写。
如果确实需要使用,可以通过缩写标签在提示框中显示其完整含义。
 缩写提示框的样式
示例:
<abbr title="Audio & video">A/V</abbr>,
<abbr title="current transformers">CT</abbr>,
<abbr title="Dutch smart meter requirement">DSMR</abbr>,
<abbr title="embedded MultiMediaCard">eMMC</abbr>,
<abbr title="flash video">FLV</abbr>,
<abbr title="Large Language Models">LLMs</abbr>,
<abbr title="Model Context Protocol">MCP</abbr>,
<abbr title="pan, tilt, and zoom">PTZ</abbr>,
<abbr title="real-time messaging protocol">RTMP</abbr>,
<abbr title="real-time streaming protocol">RTSP</abbr>,
or <abbr title="USB-On-The-Go">USB-OTG</abbr>.
行内图标
如果要在文档中提到 UI 图标,可以使用
Iconify 库中的图标。
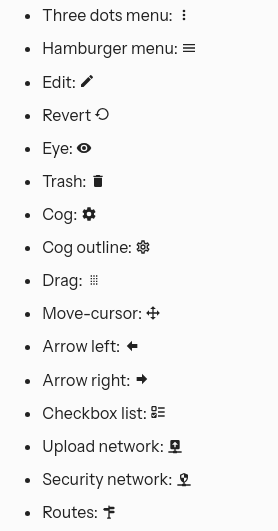 一些行内图标示例
使用示例:
- Three dots menu: {% icon "mdi:dots-vertical" %}
- Hamburger menu: {% icon "mdi:menu" %}
- Edit: {% icon "mdi:edit" %}
- Revert {% icon "mdi:restore" %}
- Eye: {% icon "mdi:eye" %}
- Trash: {% icon "mdi:trash" %}
- Cog: {% icon "mdi:cog" %}
- Cog outline: {% icon "mdi:cog-outline" %}
- Drag: {% icon "mdi:drag" %}
- Move-cursor: {% icon "mdi:cursor-move" %}
- Arrow left: {% icon "mdi:arrow-left-bold" %}
- Arrow right: {% icon "mdi:arrow-right-bold" %}
- Checkbox list: {% icon "mdi:order-checkbox-ascending" %}
- Upload network: {% icon "mdi:upload-network" %}
- Security network: {% icon "mdi:security-network" %}
- Routes: {% icon "mdi:routes" %}
可折叠文本块
如果要让一段文本可折叠,请使用 details 区块。不要使用 HTML5 原生写法,而应使用我们提供的 Liquid 版本。
 可折叠文本块的行为效果
例如:
{% details "Generate Client ID and Client Secret" %}

1. Your Fitbit account must be registered as a Developer account at the [Fitbit Developer Portal](https://dev.fitbit.com), and have a verified email address.
2. Visit the [fitbit developer page](https://dev.fitbit.com/apps/new) to register an application.
3. Enter an **Application Name** of your choosing, for example **Home Assistant**.
4. ...
{% enddetails %}
文本提示框
文本提示框可用于突出重要信息。
但不要过度使用,否则会让文档在视觉上显得过于拥挤。
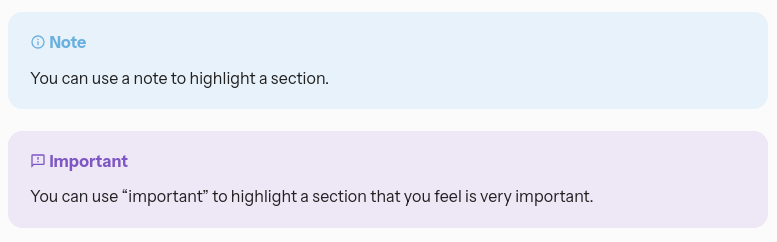 文本提示框示例:
Tip
{% tip %}
可以使用 tip 突出推荐做法。
{% endtip %}
Note
{% note %}
可以使用 note 突出需要特别说明的内容。
{% endnote %}
Important
{% important %}
可以使用 "important" 突出你认为非常重要的内容。
{% endimportant %}

